

Using Vintage Handkerchiefs to Decorate a Reticule by Michele Larrow
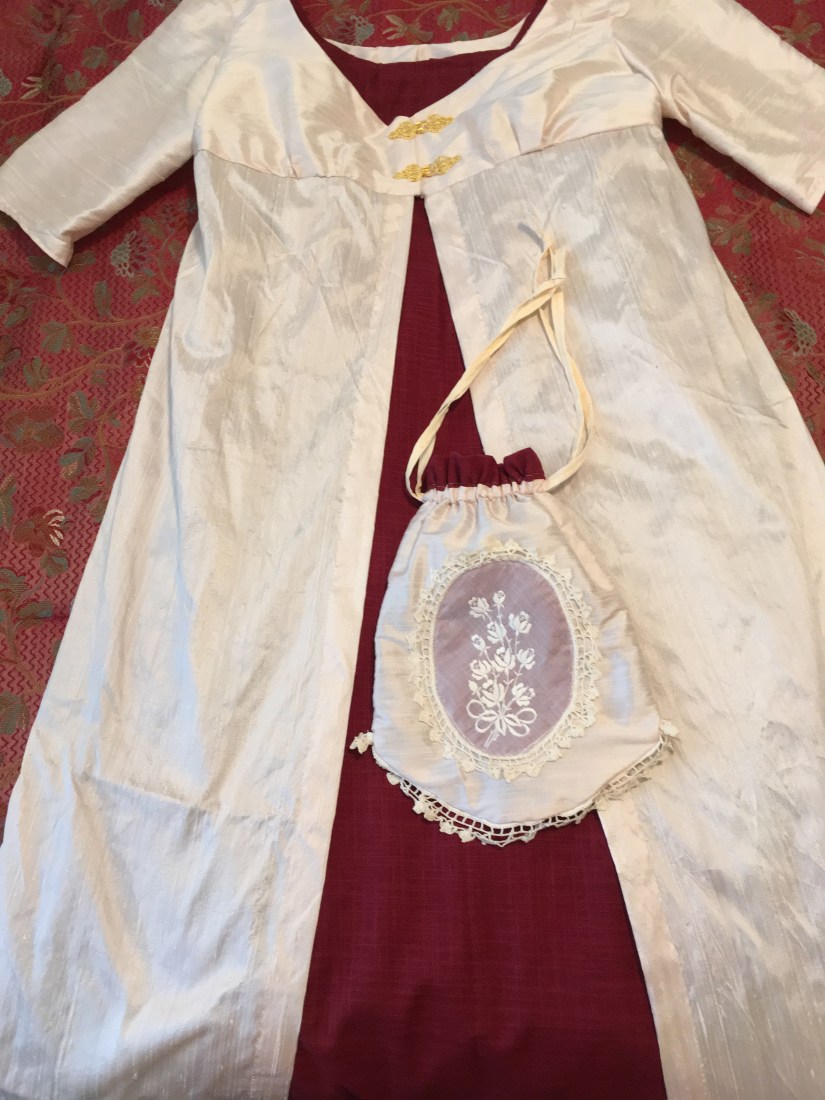
I have several vintage handkerchiefs that have lovely lace on them. I wanted to use a couple of them in making a reticule to go with my gown for the ball at the JASNA Annual General Meeting in September. The gown is of a cranberry-color cotton and the over-dress is a blush-color dupioni silk. I had one handkerchief that had roses embroidered on a corner and I thought that would be perfect for a reticule as a center applique. I had another linen handkerchief with crocheted lace (cotton, I think) for a nice lace border decoration. I planned to use the blush color silk for the body of the bag.
- My first step was to find some inspiration online for reticules. I found a great Pinterest page on “Regency Bags and Reticules” https://www.pinterest.com/CeruleanHMC/regency-bags-and-reticules-1795-1830/ that had many wonderful period examples. There was one bag especially that caught my eye from the Museum of Fine Arts in Boston because it had roses, had a drawstring, and was made out of silk. It was also about the size that mine ended up being. Although it was painted instead of embroidery, it was good inspiration for me.
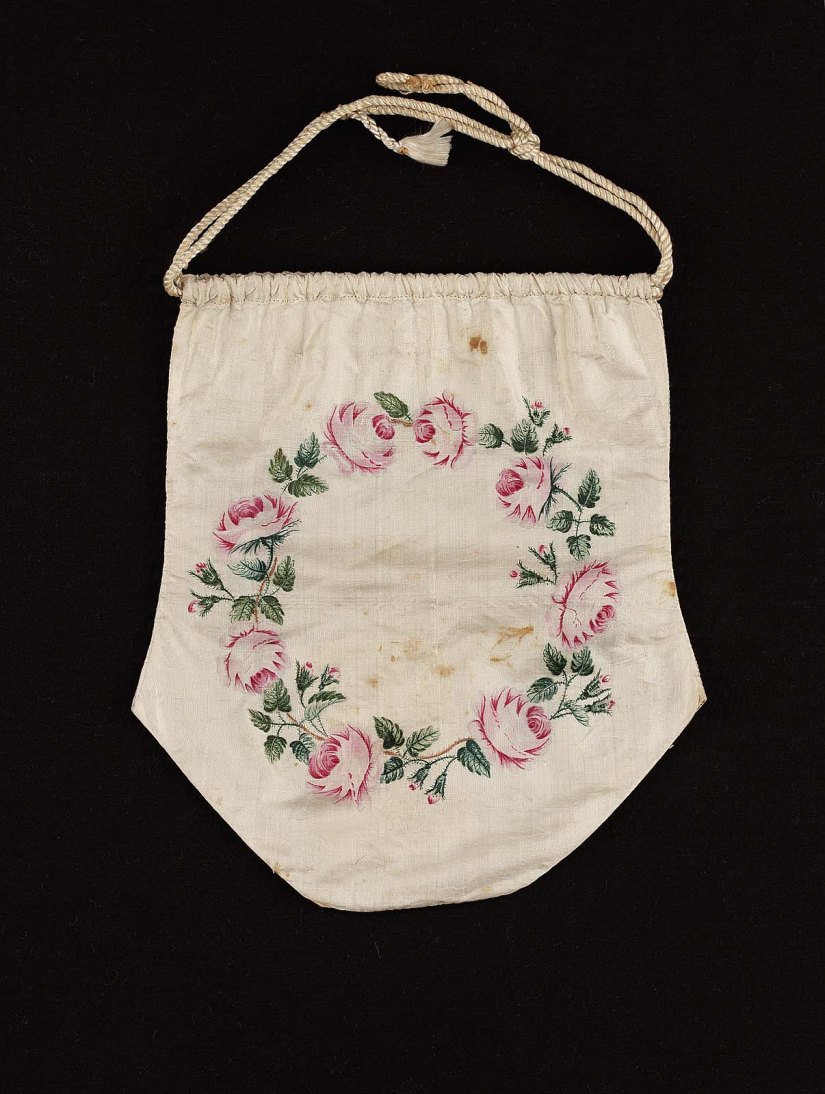
Reticule MFA: https://www.mfa.org/collections/object/bag-115924
- I started by creating the center applique of the roses. The cotton of the handkerchief was quite sheer, so I backed it with the cranberry color of my gown, using the sturdy cotton that was used for the lining. I first pinned the handkerchief over the cotton backing measuring so that the embroidery would be centered. After I pinned it and cut a rough oval bigger than I needed, I folded over the edges and basted the two fabrics together, making sure to keep the piece even and centered all around. Next, I took the lace from another handkerchief and pinned it to the back around the edge of the oval, trying to get it as even as possible. I basted the lace onto the oval applique, leaving some of the linen from the handkerchief to secure the layers on the back. When I got to the lace on the corner of the handkerchief, I had to cut the linen close to the lace to get it to lay as straight as possible, but I was able to complete the full oval with two sides of the handkerchief.

- Once the applique was basted, I decided on the dimensions of the reticule based on the size of the center applique. I wanted to have about one and a half to two inches of the silk on the sides and bottom (which I made round to echo the oval applique) and I left more space at the top of the fabric for the drawstring. I ended up with finished dimensions of about 8.5 inches by 12 inches, including the top border. The pattern that I created for the silk was about 9.5 by 12 because the border at the top was a different color. Once the silk was cut for the bag, I basted the oval applique on the right side of the fabric toward the bottom with even margins for sides and bottom. After it was basted, I machine-stitched it twice right around the perimeter of the applique, through the layers of the applique and the linen that holds the lace border.
- On the other side of the silk fabric I basted the lace for the bottom of the bag on the right side of the fabric, pointing the lace toward the top of the bag and sewing along the linen border that was left from the handkerchief. I had to hand-sew two pieces of lace together to make a lace piece that was long enough because I had to cut out some stains from the lace border on the old handkerchief. I made sure to tack down the lace at the sides so that it would not get caught in the side seams when the bag was stitched together (see drawing). I basted the two bottoms sides together to be sure the lace was positioned correctly and then I sewed the sides and the bottom of the bag and turned it right side out. The bottom lace is not perfectly aligned, but pretty close.


- I made a lining of the same sturdy cotton fabric that was used for the applique, using the same dimensions as for the bag. I sewed the sides of the lining, but left the bottom open for hand-sewing after the lining was sewn to the bag. I also created a small band at the top of the bag of the fabric of my gown, which is a looser weave (as wide as the lining and about 3 inches long). I sewed the sides of the border and attached it to the bag and the lining, pinning right sides together and matching side seams. Once the lining was complete, I turned the bag right side out and then hand-sewed the bottom of the lining closed using a slip stitch. I put the lining inside the bag and made the border even at the top. Next, I sewed two lines around the bag near the top border to create the pocket for the drawstrings, leaving about 5/8-3/4 inch for the drawstrings to move freely. I opened the seams on the outside of the bag in the pocket for the drawstring. The drawstrings were created by folding a one-inch wide ribbon in thirds and then sewing down the middle. One drawstring came out on one side of the bag and the other on the other side, so that it is easy to cinch and open the bag. I threaded the drawstrings through using a safety pin to push them through and it required a little maneuvering to get the drawstrings out on each side. Once they were out I made them even and knotted the ends, hand sewing the end of the ribbon to keep it from unraveling.
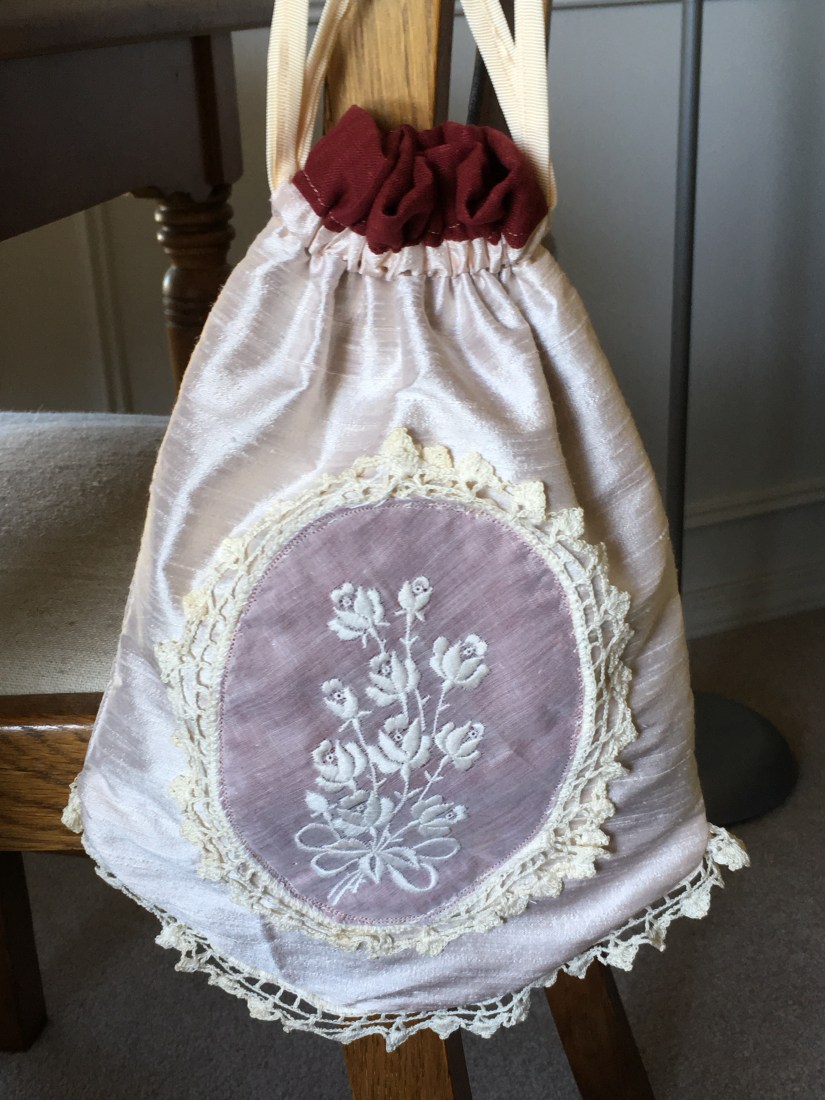
- Once the bag was completed, I realized that I had to tack down the lace around the central applique because it flopped over the top when it was held upright. After doing that, the bag is ready to go. The finished dimensions of the bag are 8.5 inches by 12 inches, the perfect size for my Emma and other necessities.


